
In the summer, most children rest at home, in the country, in the dacha or in any resort.
To do something you can find various handicrafts that will not only be interesting, but will also remind you of the summer in the future.
You can also make crafts that children can play and have fun with. Here are some very interesting summer handicrafts for kids:
Crafts for the summer. paper fruit.
– Acrylic paint or gouache (red, orange, green, lemon, yellow, white)
– colored cardboard (yellow, orange, green, pink, white)
– Felt-tip pens (brown, yellow, orange)
1. Take paper plates and start painting them – one in red, the other in orange and so on. Choose all the colors that match the fruits you chose.
You may need to apply a second coat – let the panels dry, then add a second coat.
If you want to paint a paper plate like kiwi, you need a mix of green and white.
2. Place a paper plate on a sheet of colored cardboard and circle it to get a circle. Follow the directions for each fruit:
– Cut a circle out of white paper, the diameter of which is 1 – 1.5 cm smaller than the diameter of a paper plate.
– Use a glue stick to stick the white circle on the red plate.
– Cut the plate in half and draw a black or brown felt-tip pen.
– Cut a circle from the orange cardboard that is slightly smaller than the diameter of the plate.
– Fold the circle in half and again in half and then the third time in half.
– Uncouple once and cut out the middle parts of each triangle with scissors (see picture).
– Bend your workpiece completely and glue it to the orange plate.
– You can finish with the orange felt-tip pen.
Repeat all the steps for the orange with yellow paper and a felt tip pen.
– Cut a circle from the green paper, the diameter of which is slightly smaller than the diameter of a paper plate.
– Fold the circle in the middle and cut the oval in the middle of the fold.
– Lay out the paper and draw the seeds with a brown marker.
– Glue the workpiece to a light green plate.
– Cut a circle out of pink paper so that it is slightly smaller than a paper bowl.
– Glue the circle on the green plate.
– Cut the plate in half.
– Use a brown marker to paint the seeds.
See also: Children’s craft for kindergarten
And here’s another thing that paper plates can do:
Crafts in the summer with their own hands. The sun.
– on pair branches
– Fabrics in yellow, red and orange tones
– Thread and needle (if desired).
1. Collect 8 branches, about 1 meter long (maybe less).
2. Place all branches on a flat surface so that they form a star.
3. Connect the branches together using a cord. First connect the two branches in the form of a cross and then add two more branches in the form of the letter X..
Here is one way to connect sticks with a rope:
4. Use scissors to cut the fabric into strips of any width. In this example the width of the strips is 5-6 cm. You can tie the strips together to get a long strip.
5. Start your sunshine "knit" and wrap the connected branches with a cloth. First tie one end of the fabric from the branches to the center of your sprocket and start wrapping the strip along a spiral.
When you’ve tied the sun, just tie the end of the strip of fabric to any branch.
Also read: 10 cute handicrafts for children and adults
Crafts in kindergarten for summer. Aquarium.
– Pencil (to draw a fish)
– Scissors (to cut fish)
– Fishing line or strong thread (to attach one end to the button and the other to the fish)
– Stationery knife or scissors with sharp ends (to make incisions on the box)
– Adhesive tape (to fix the fragile areas on the box)
– double-sided tape (to attach the handmade item to the wall).
Also read: 12 handmade items that children will like and teach them something new
Crafts in the summer for children
– Cardboard tubes made of toilet paper
– Sticks with ice cream and scotch tape to connect the sticks.
Crafts for children from 10 years. glass window.
– self-adhesive film or broad adhesive tape
1. Cut a circle from a paper plate.
2. Cut from the self-adhesive film a circle that is slightly larger than the plate.
3. Turn the plate over and glue the film carefully so that it does not touch anything other than the bowl itself.
Instead of an oilcloth, you can use a wide scotch – cut off several strips of it and glue them evenly and evenly on the plate so that the strips almost do not touch.
4. Turn the plate over and start attaching various leaves, flowers, and other plants to the ribbon or oilcloth.
Summer. Crafts. Multi-colored windmill.
– a row of chopsticks for children’s handicrafts (in this example there are 200)
– Fishing line or other strong thread
– an awl, a screwdriver or a drill with a thin drill
– large beads (5 pieces in this example).
1. Make a small hole in the middle of each rod so that you can stretch the needle and thread.
2. Thread the needle and thread through a large pearl, making sure that the pearl is in the middle of the entire thread.
3. Connect the ends of the thread and pull the double thread through the holes in the rods. You can first stretch through 10 chopsticks of the same color, then 10 chopsticks of a different color and so on.
4. As you thread through all of the sticks, it’s time to add 4 more beads (you can use as many beads as you like).
5. Tie the ends of the thread to the knot and make a loop so the ship can be hung up.
6. Correct the bars so that they resemble a spiral staircase.
Enjoy your craft when a light breeze blows and it starts to turn and the colors flow out.
Children’s craft on the subject "summer". Toy jellyfish.
See the instructions for creating a jellyfish for a video with a detailed explanation.
1. Place the bag on the table and cut the bottom (bottom) or, if the handle pack, the top part to get a square.
2. Cut the bag into two equal parts.
3. Take a piece so that a small ball forms in the middle. Wrap this ball with a thread on the bottom.
4. The lower part (everything under the "ball") cuts into the edge to form the pliers of your jellyfish.
5. Fill the bottle with water and color it with blue food coloring.
6. Pour a little water into the "head" the jellyfish and slide the handmade item into the bottle. Close the cover.
Also read: 20 easiest crafts for everyone
Crafts for children from 5 years. Fish and flower.
– Sequins (if desired).
1. Cut out the triangle from the yellow cardboard and prepare a sheet of blue cardboard.
2. On the blue cardboard, glue a round lid from the bottle – the stem of a fish, and next to it a triangle – a tail.
3. If you want, you can use a glazik toy or use a felt pen to draw it, or a piece of plasticine.
4. You can also decorate the fish with sequins – it is better to use glue with glitter all at once.
5. Composition on blue cardboard can be supplemented with a few other fish and green paper algae. For algae you can cut out, shred and glue green paper strips.
6. Bubbles can be made with a normal cocktail tube and white paint.
In the same way you can use an application "flower" do:
A strange thing about summer. Multi-colored butterflies.
– Cardboard sleeve (made of toilet paper or paper towels)
– colored or wrapping paper
– Cardboard (normal or colored)
1. Take the sleeve and wrap it with colored paper. Cut off the excess and glue the sleeve with plain paper. You have a butterfly stem.
2. You can glue the toy eyes. If not, you can use a marker to draw them, or plasticine.
3. Cut 2 pieces of tape, tie one end of the tape to the knot on each part. Glue both parts on the inside of the sleeve with nodules to the outside to make the butterfly antennas.
4. Draw butterfly wings on a piece of colored cardboard, cut them out.
5. You can decorate wings with flowers made of colored paper or colored cardboard.
6. Glue the wings to the body and you’re done!
Crafts for the summer. Dinosaurs in blocks of ice.
– little dinosaurs and other toys
1. Fill the plastic container with a third of water, add the blue food coloring and stir. Put some kind of toy, e.g. B. sea animals and place them in a freezer.
2. When the water is frozen, remove the container, fill it with water for another third, add a green food coloring, stir and put in the water of other animals, for example agricultural, the container in the freezer.
3. When the water of the second layer is frozen, take out the container and fill the last third with water, add a blue dye, stir and place a third type of dinosaur animal in the water and put it back in the freezer.
4. When the third layer is frozen, you can use an ice block to get and give to the children so that they can use toy tools to search for hidden animals.
RELATED ITEMS
-

5 best all-terrain strollers in 2018, others: women’s magazine january 2020
Female V > Over the years, strollers have been modified to meet the needs of parents and children, aside from that…
-

Summer spanish courses in spain, learn spanish summer course in spain
Find, buy and save money with your summer course in Spain. Learn Spanish and enjoy everything that Spain has to offer in summer: sun, beach,…
-
Best gifts for kids and toddlers ~ or love each other
ababywearingmom – October 23, 2019 October 23, 2019 It is October, Christmas is inevitably coming to our hearts. And maybe it says…
-
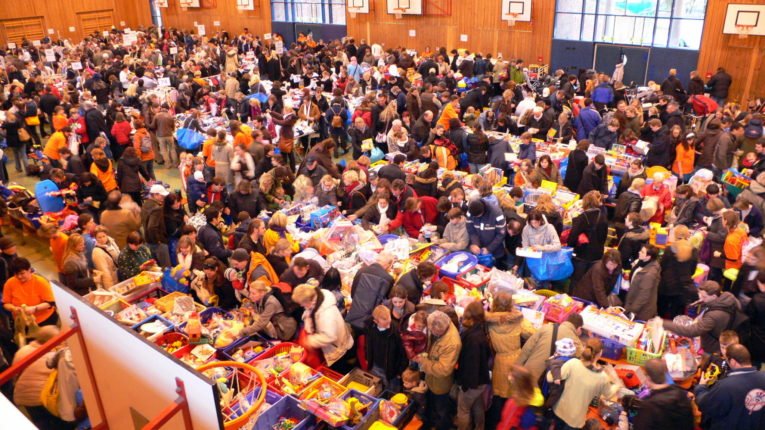
The best children’s flea market in Hamburg
Yes, the Hamburg children’s flea market is worth it. There are great and worthwhile children’s flea markets in the city. However, it is difficult to find the dates….