
The time for sweet dresses begins with babies. No wardrobe should be without the little girl moving in with the family after birth. And if moms, grannies or aunts reach for the knitting needle, then it won’t stay with a baby dress.
We join the self-evident knitting joy with a self-knitted baby dress. Our children’s dress is very simple and therefore easy to knit for beginners.
We present the instructions for the baby dress in size 56. This is roughly equivalent to a 1-2 month old baby. But that does not mean that you cannot knit this baby dress in the following sizes. The basic pattern always remains the same. You just cast on a few stitches and knit more rows in length. The sleeve neckline is always knitted in the same way.
For our instructions, we have chosen a pattern that is just as suitable for warm days as it is for cooler ones. The children’s dress consists of a skirt, bib and straps. So you can wear it with or without a T-shirt on warm days. Often only the body under the dress is enough, and the Baby looks chic right away. And the long-sleeved shirt also looks very pretty underneath.
To assist you, we have created a small pattern for the children’s dress. All centimeters for size 56 are given on this sample. For each additional size you have to add 3 centimeters to each length.

For this you should knit a stitch sample. You can use it to calculate exactly how many stitches you need for 1 or. Need to knit 3 centimeters with your yarn.
Material and preparation
When knitting baby clothes, you should pay particular attention to the wool or yarn that you are processing. Babies not only love it soft and cozy, the yarn should also be light and free of harmful substances.
Special baby wool is available in specialty wool stores, including online. This wool or yarn is especially tailored to the needs of the little ones. For the warm season, a soft cotton blend is suitable, for the cold days there are very cozy new wool yarns, especially for the little baby.
We have for a decided summer dress and therefore knitted it with a very soft cotton blended yarn. Our yarn corresponds to the wool Rico Baby Cotton Soft from wool Rödel. It consists of 50% cotton and polyacrylic. It is therefore very easy to care for and wonderfully soft.
We knitted with a needle size of 3.5 mm.
According to our instructions you need:
- 130 grams of cotton blend yarn with a barrel length of 230 m / 100 grams
- 2 short needles with a needle size of 3.5 mm
- 1 circular knitting needle also with a needle size of 3.5 mm

techniques & template
The children’s dress is knitted in two parts. The front part and the back part. These are sewn together at the end and held together with two knitted straps. The basic pattern consists of right and left stitches – smooth right pattern. Knit in the right side and left stitches in the back row.
Small pearl pattern
The straps and the border on the sleeve cutout and on the sewn-on pocket have been worked in a pearl pattern.
Always knit alternately:
- 1 stitch on the right and
- Knit 1 stitch.
On the back row, all stitches are worked in opposite directions when they appear.
cord stop
We have processed a special pattern for the attachment: the cord attachment.
It actually has the character of a cord and thus brings some momentum to the front row.

We did not invent this special cord stop, but copied it from “Knitting with eliZZZa”. It is very easy, but has a great effect. You must knit this cord stop with two short knitting needles. Because the knitting is not turned, it is only pushed back and forth.
1st row
Cast on 3 stitches on a short needle. Do not turn the work. To do this, push the work on the needle to the other end of the needle. Now the working thread is on the left side, but that doesn’t matter. When you continue knitting, simply bring the thread back to the first stitch after work. Do not pierce the first stitch at the back, but at the front.
Knit all three stitches. Push the needle to the left again.
In this way, always knit all 3 stitches and push from end to end of needle for a new row.

When the desired length is reached, proceed as follows:
2nd row
Cast off the first 2 stitches.
The stitch which is not cast off is the first stitch or edge stitch of the knitting. Now get a new stitch out of each stitch thread (see picture) with your working thread on the needle. Continue until you have created all new stitches.

Turn the work
3rd row
The stitch pick was a right row. You continue knitting with a row on the left. All stitches on the left are knitted twisted on the left.
Tip: Cross-stitched left stitches To make it easier to insert the back stitch, it is advisable to turn the front part of the stitch slightly to the left with your thumb and fix it. This makes it easier for you to insert the back part of the stitch.

4th row
Knit all stitches twisted together.
5th row
Work all stitches twisted to the left. The stitches must be worked crosswise because they stretch very long with normal knitting techniques and result in an unclean stitch pattern. That is the whole art of hanging the cord.
A clean edge stitch
In our magazine, we show you how to knit a clean edge stitch: Knit edge stitches – learned quickly. In the children’s dress, we worked all the edge stitches as a chain edge.
Knit baby dress in size 56
You can decide yourself with which stroke you want to start the children’s dress. At the end of the cord, you must knit the cord until you can pick up 72 stitches on a new needle. You then work these 72 stitches exactly as we described it in the basic pattern.
Continue from row 6 as described.
Skirt of the dress
With a normal stitch cast on 72 stitches.
Knit the first 5 rows in a pearl pattern. From the 6th row, the skirt of the children’s dress begins for both strokes.
6th row after the stop
We have changed the thread color from this row. Work right up to the 10th row in the basic pattern.
- Row right stitches
- Back row of left stitches
10th row
From the 10th row, the decrease begins on the right and left edge of the skirt from the dress.
The first three decreases are after:
- 4 centimeters
- 8 centimeters and
- 12 centimeters
How to lose weight:
- edge stitch
- 1. Lift stitch
- Knit the 2nd stitch
- Pull the slipped stitch over the knitted stitch.
- Knit all other stitches
- The last two stitches before the edge stitch
knit together - Repeat this decrease 3 times in total.
Tip: To see where you lost weight, you can put a stitch marker here.
After the 3rd acceptance:
- Knit 4 rows as normal
Then knit three stitches together in every 4th row for the skirt slope on the left and right of the knitting (as described on the skirt).
The skirt width of one side is reduced by 5 cm due to the decreases.
Knit back and forth after the last decrease.

Sleeve cutout – the bib
The skirt of the children’s dress is now fully knitted. It continues with the bib part of the dress.
Here is removed on the sleeve neckline. To make it a nicely visible decrease, we knitted the first 5 stitches after the edge stitch with a pearl pattern and only then decreased.
Now continue knitting:
- edge stitch
- Knit 5 stitches in pearl pattern
- Slip 1 stitch
- Knit 1 stitch
- Pull the slipped stitch over the knitted stitch.
- Knit with right stitches up to the 7th and 8th stitch at the end of the needle.
- Knit 2 stitches together
- Work 5 stitches in pearl pattern
- 1 edge stitch
- Turn work
Knit the middle part in each row with back stitches. Work the pearl pattern opposite as usual. Decreases always take place in rows with right stitches. Repeat this decrease for the bib of the baby dress a total of 12 times.

Then work 7 rows continuously in a pearl pattern. We knitted these 7 rows with a second thread color. On the front of the dress in this pearl pattern border on the left and the Make 1 buttonhole on the right side.
It works like this:
- edge stitch
- Knit 2 stitches
- 1 envelope
- Knit 2 stitches together
Work in the opposite direction on the left side of the border. In the back row, knit the envelope as a stitch. You have to follow the pearl pattern, whether the envelope becomes a right or a left stitch.
Cast off all stitches after the 7th row of pearl patterns. Knit the second part of the baby dress in the same way.

The basic structure for the children’s dress is ready.
Knit straps
The front and back are held together by straps. To do this, knit like this:
- Cast on 7 stitches
- edge stitch
- Work 5 stitches in a pearl pattern
- edge stitch

Knit bag
So that the dress gets its special chic, we have knitted a small pocket on the front.
- Cast on 27 stitches
- Knit 5 rows in pearl pattern
6th row
- edge stitch
- 3 stitches in pearl pattern
- Knit all other stitches.
- At the end of the row work 3 stitches pearl pattern again
- 1 edge stitch
You can of course make the bag as big as you want.
Our bag has the dimensions:
- 10 centimeters wide
- 7 centimeters high

After knitting, sew the pouch onto the dress with a fine thread at the back of the stitches. You have now finished knitting all parts. Before sewing the front and back parts together, you should sew up all loose working threads. After sewing the two large knitting parts together, sew the straps onto the back part.
At the end of the carrier you have to sew on a button. However, we did not choose a button that we had bought, but crocheted a small white flower as a button. We crocheted and sewed the same flower onto the bag.

You can of course also modify the baby dress now. You can also knit the borders with the pearl pattern larger. Instead of sewing on a bag, you can also embroider flowers. Or little beetles. Your imagination is the limit.
RELATED ITEMS
-
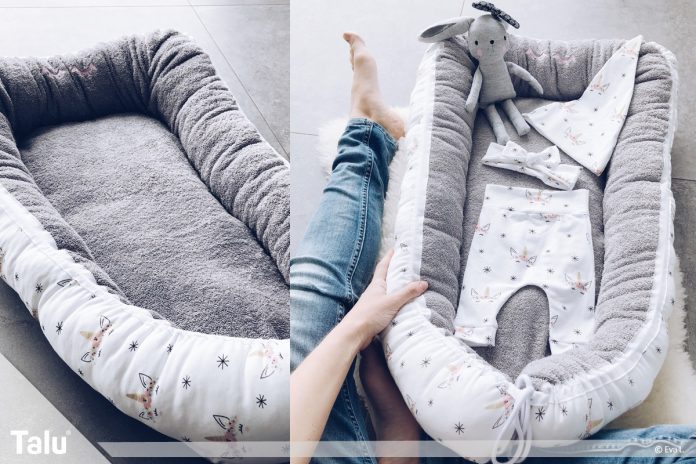
Sewing a nest – free instructions for a baby nest
After the birth, all mothers want their child to feel at home in the new environment. One of the many things that help is one…
-
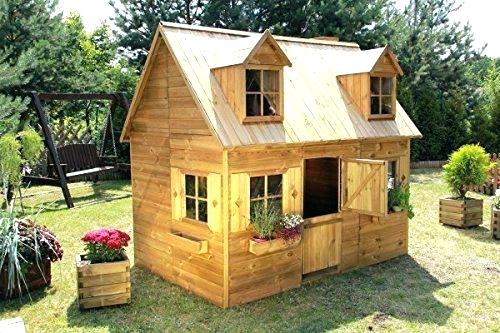
Children’s house build instructions
The renovation of the old town hall can be completed in May 2019. With the completion of the construction measure, the construction and finance management will move on….
-
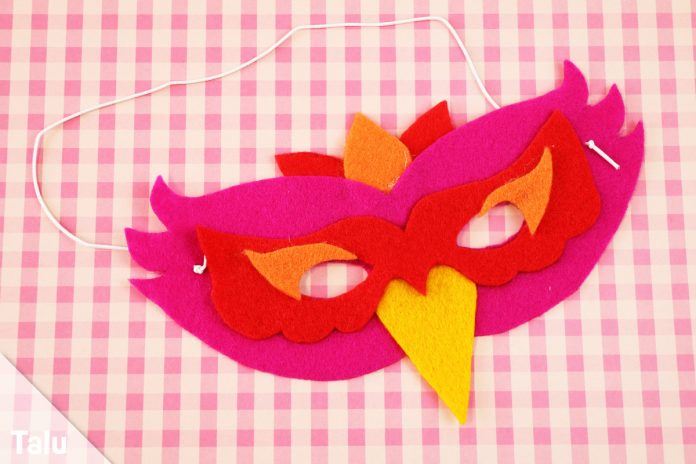
Make a bird mask – instructions with template and template
You are looking for creative ideas for do-it-yourself colorful bird masks – your children will be amazed by these ideas! The following instructions…
-
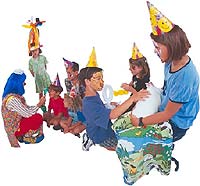
Children’s birthday games: instructions for birthday games for children, philosophy
If you want to make your son’s or daughter’s birthday party a real event, you have to come up with something special. there…