
At no time in the year is crafting more fun than in winter. Especially when it comes to Christmas, it is a great pleasure to make decorative elements yourself. In this guide we show you many great ideas for creating individual Christmas tree decorations. We present simple and very quickly implementable variants as well as somewhat more extensive projects, which can also be mastered with the right materials without any problems.
A bare tree for Christmas? Nobody wants that. Christmas tree decorations have a long tradition and are simply part of an all-round successful celebration. Unfortunately, retail products tend to be more expensive than cheaper – and often don’t even look particularly nice. So it makes sense to lend a hand and make your own Christmas tree decorations. The possibilities are more diverse than you would think at first. We have put together our ten favorite ideas for individual Christmas tree decorations and provide you with practical instructions for each individual variant. Have fun creating – you are also welcome to involve your children!
A short portrait of simple ideas for self-made Christmas tree decorations
First of all, we would like to introduce you to many simple options for making Christmas tree decorations yourself. As a rule, these do not require a lot of time or much financial effort.
Cones with snow
Collect small and large pine cones in the closest nature area. As a result, you have several options for refining the cones, for example the following:
Possibility A: Spray the elements with gold or silver-colored spray paint or with spray snow. Let dry. Glue a tape as a suspension in the upper area of each pin.
Option B: First roll the cones in glue and then roll them in glitter powder. This is how you achieve a magical glitter effect.

Then stick on a tape as a suspension. The result is simple but exciting Christmas tree decorations!
candy Canes
Our third idea can also be easily implemented by children. What you need for the non-edible yet incredibly sweet pearl candy canes are pipe cleaners, pearls in two different colors (should match other Christmas tree decorations) and possibly scissors. Take a pipe cleaner and cut it to the desired size if necessary. Then tie a knot at the top. Then thread the pearls alternately in one color and the other. Knot the pipe cleaner below again. Finally, slightly bend a piece of the upper part to the right, so that the typical candy cane shape is created. Repeat the individual steps to make several candy canes as Christmas tree decorations.

Zimtstangenbündel
For many, cinnamon sticks are an essential part of the Christmas season – whether as ingredients in tea or as decorative elements. You can also convert the pretty poles into Christmas tree decorations. All you need to do is take a few of them and tie them with a fine ribbon. Knot the ribbon and then loop. Chic accessories are finished that both delight visually and exude a pleasant fragrance. The mess can no doubt come.
Tip: Use gift ribbons in a color that matches the occasion and other Christmas tree decorations – for example in red, gold or white.
Salt dough-trailer
Various decorative elements can be made with salt dough – including Christmas tree decorations. The best thing about it: In addition to the figures, you can also easily make the dough yourself. How this works in detail is shown in these guides: make your own salt dough and dry the salt dough.
In addition, the following articles will help you get a feel for crafting with salt dough:
Tip: To make Christmas tree decorations from salt dough, you can use cookie cutters with Christmas motifs – such as stars or Christmas trees.
paper stars
Another idea for self-made Christmas tree decorations are paper stars for folding. There is also a separate guide for this at talu.de: tinker paper stars. Pick your favorite instructions and get started straight away. Most of the stars are not too difficult to make, so you can also involve your children.

fairy lights
What would the Christmas tree be without a string of lights ?! Just. The glowing element is an essential part of the Christmas tree decorations. Here: tinker fairy lights you will find, among other things, instructions for making a fairy lights with balls of thread. It fits perfectly with a modern Christmas tree, which should look completely different than before.

After these short ideas and recommendations, we now turn to the detailed instructions on the topic of Christmas tree decorations. We will introduce you to snowmen made of felt, snowflakes made from clothespins and real classics, namely straw stars.
Make felt fir trees
You need:
- felt
- wood Beads
- line
- needle
- scissors

manual
Step 1: Cut a 1 cm wide and 30 cm long strip from the felt.
2nd step: You need an approximately 40 cm long piece of the cord. Thread the thread on the needle. In the end, make a thick double knot around the first pearl.
3rd step: Now insert the needle about 5 mm from the edge of the strip. Then a second pearl comes on the thread. Now the strip is placed in a bow around this pearl and again pierced through the felt. Now always put in change of pearl and felt the stripes in the arch back and forth so that the individual arches are always a bit wider. At the end, the strip is attached with a last pearl.

4th step: Knot the end of the cord and cut off the excess end.
5th step: The felt tree now needs a loop as a suspension. This is simply attached to the top pearl. Finished!

Crochet snowflake
Do you love crochet and would you like to use homemade decorations for Christmas or even give them away? Why not try these decorative crochet snowflakes? You can find a detailed description here: Crochet snowflake

Wooden stars from brackets
You need:
- Wooden clothes pegs (8 per star)
- Gift ribbon made of fabric (in gold or brown)
- Hot or wood glue
- scissors
- Spray paint in white or gold

manual
Step 1: Pick up eight wooden pegs.
2nd step: Disassemble all the clips by carefully removing the metal springs.

Note: After this step you have 16 wooden elements and eight metal springs. You can throw the latter away if it is not otherwise used for Come into play should.
3rd step: In seven of the eight wooden clothes pegs, glue the two halves together using hot glue.

4th step: Cut a piece of gold-colored or brown fabric gift ribbon and fold it in the middle into a loop.
5th step: Place the "open" ends of the loop between the two halves of the remaining clip.
6th step: Now glue this eighth clip together. Make sure that the loop does not slip.

7th step: Now build your snowflake.
a) Take two of the glued elements and glue the flat ends of them together at right angles.
b) Using the same principle, add two more elements glued together. As a result, an X is created.
c) Repeat the procedure with the remaining four glued elements.
d) Glue one X on the other X to create a snowflake shape.

If you want, paint the snowflake with white or gold-colored spray paint. Colors with a shimmer effect look particularly pretty. Or you can decorate the stars with sequins or glass stones.

An extremely elegant Christmas tree decoration is ready!
Straw stars as Christmas tree decorations
You need:
- straw
- straw splitters
- Lege form
- yarn
- household rubber
- scissors
- Iron
- Bowl of cold water
- paper towels
manual
Step 1: Pick up straw and the straw splitter.
2nd step: Pull the straw through the splitter. This creates fine, even stripes.
3rd step: Soak the split straw in the bowl with cold water for about ten to 15 minutes.

4th step: Dry the straw carefully with kitchen paper.
5th step: Iron the straw flat at low temperature.
6th step: Now comes the creative part: Place the individual straw strips back and forth, but evenly between the spikes of the laying mold.

In these detailed instructions you will find a variety of possible variants for straw stars: tinker straw stars
Note: You will receive different patterns depending on how you proceed. Just experiment!
7th step: Grab a household rubber, tighten it as a ring around the prongs of the laying mold and push it down. In this way you press the straw strips together stably.
Step 8: Apply the laying form.
Step 9: Tie the ends of the straw strips together at the crossing points with gold-colored thread.
10th step: Now remove the rubber band and the laying form.
11th step: Trim the stars with scissors.
Caution: Only shorten behind the thread, otherwise you will destroy your Christmas tree decorations!
Step 12: Cut a small piece of the gold-colored yarn.
Step 13: Attach the piece of yarn to a corner of your straw star in the form of a loop. The latter acts as a suspension. Your classic Christmas tree decorations are ready!
RELATED ITEMS
-
Playhouse blueprint, build yourself in the garden with building instructions
A play house blueprint makes it very easy to build your own wooden house. Many fathers or families take on this task and challenge…
-

Invitation cards kids birthday tinker templates – birthday invitations to print out
Invitation Cards Children’s Birthday Printable Horses: Invitation Cards Children’s Birthday Do It Yourself Templates Invitation Cards Children’s Birthday To…
-
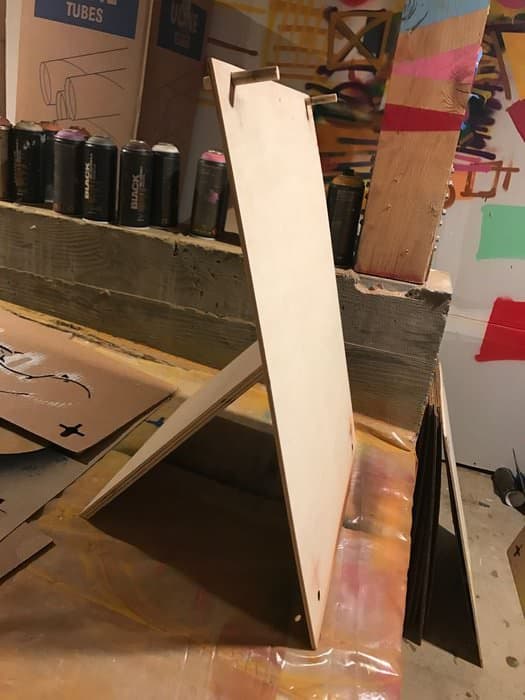
Build your own easel – 7 instructions for a diy easel
If you are an artist, you know that a high-quality easel is essential for the design of works of art. There are a number of…
-

Other interesting contributions: Fulfill a small dream for your grandson or child and at the same time something for fitness and the…