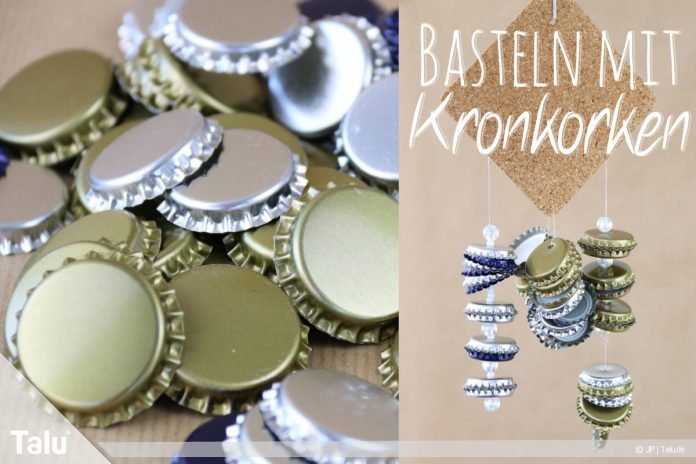
Crafts with bottle caps is an interesting alternative to classic materials. Children, in particular, enjoy creative beer crown ideas because they can live out their imaginations with them and, thanks to the simple methods, can quickly achieve a satisfactory result. The color and pattern selection in particular allows numerous designs that can be implemented excellently. It is also easy to paint and stick on the metal closures.
If you are passionate about tinkering with your own children or regularly taking care of groups of little rascals, tinkering is an option Capsules excellent as employment and creative incentive. The closures made of sheet metal are easy to bend, glue, drill through or paint due to their weight, structure, colors and pattern and are therefore often used for numerous craft projects.
Not only decorative works of art can be created from the shaped sheets, but effective everyday items that you can easily produce yourself. For many projects, you don’t even need tools because they can be tinkered alone or with children.
Crafts with bottle caps
10 creative beer crown ideas for kids
If you want to combine bottle caps with your children into small works of art or practical everyday objects, you will find numerous ideas.
Various techniques are used:
- paint
- glue
- spear
- bend
- spray
- fill

This is just a small overview of how you can use your Process bottle caps and be able to design new projects. The advantage clearly lies in the simplicity of how the closures can be processed. It hardly requires any strength or the use of equipment, which makes crafting with bottle caps particularly interesting for children.

To give you ideas for your own Design with beer crowns 10 creative beer crown ideas below, some of which can even be implemented without shopping in the craft store if you already have the appropriate utensils at home. In any case, it is important to know how to defuse them.
- take a hammer
- carefully push the prongs inwards
- alternatively mask with masking tape
- alternatively grind

When crafting with bottle caps you should definitely use this step if children involved. These can quickly injure their teeth, especially if they are sharp.
Bottle Cap Magnets
Magnets are one of the most popular craft ideas that use bottle caps. This craft idea is especially fun for children, since it is the Bottle Cap Magnets end up hanging yourself. The best: You hardly need any materials and the procedure is extremely simple. In addition, you or the children can choose the design of the magnets, which is a lot of fun.
The necessary utensils for this are:
- Crown caps with a diameter of 26 mm and 29 mm
- Super glue or hot glue gun
- Magnetic plates (100 pieces cost about 6 euros)

In addition to these, you can also use colors or stickers to customize the beer crowns according to your own preferences. To the Paint Acrylic paints or spray paints are best, depending on how the designs should look. Even decorative elements such as loose eyes or small artificial flowers, you can stick on them and thus define the style. Decorate the bottle caps before attaching the magnet.

Follow these instructions:
- Capsules Inside wash out
- dry
- Fasten magnet with superglue

- Allow to dry, decorate crown cap magnets as desired
You can then use the magnet immediately. The big advantage of the magnets is the possibility of even large quantities in a short time to edit. This allows you to easily make an entire alphabet, for example.

Wind chime made of beer crowns
Creative beer crown ideas inspire above all with their unique variety. When tinkering with bottle caps, you can even get one greyhound that draws attention all year round with the clinking noise. For this you can use a wide variety of materials for the suspension, ranging from a holey metal bowl to wooden sticks to bottles.

You can find yours here fantasy Let it run free. This is also the case with the cords or chains that you use for this project. Of course, you can also decide the style of the beer crowns yourself.

Following are instructions for the construction of a wind chime:
Step 1: Start by connecting the bottle caps together. To do this, drill a small one hole a few millimeters along the edge, through which you can then pass the cord or chain links.

2nd step: Start with that line to thread from below through all bottle caps. With each bottle cap you have to tie a knot on the bottom so that it doesn’t just slide down.

3rd step: Once all the beer crowns have been threaded and fixed, attach the individual elements to the base, which in turn is attached to the ceiling with a cord on a hook.

It is advisable to avoid moisture protected place, because this allows you to paint or paste the beer crowns without losing the design due to rain or snow. When hanging, make sure the cord is thick and the hook strongly is enough to support the weight of the wind chime.

Compared to other wind chimes, the is sound somewhat quieter, especially if you only use a few beer crowns.
Capsules macarons
Because of their shape, bottle caps are ideal for pretty projects that exude their very own charm. This also includes Capsules macarons. This crafting idea presents two bottle caps that form and fill the two halves of the macaroon. This idea inspires children and teenagers alike, as they can be kept in different colors.

For a macaron you need:
- 2 bottle caps of the same size
- Super glue or hot glue
- colorful foam rubber
Glue the two bottle caps directly onto each other and fix them. Then you can, for example, apply small pieces of glitter to the glue or after applying a little silicone color. Be sure to use pastel colors, because classic French macaroons are kept in soft colors. Girls love to make macarons. If you stick another cord in the middle, you can even hang the macarons.
Or fill your makaron with before gluing it together foam rubber. To do this, cut out small circular shapes and use your bottle caps as a measure or template.

Cut another circle out of foam rubber and stick it on your first cut foam rubber circle.

Then glue on the second bottle cap. And your first macaron is ready!

Beer Crown Buttons
Buttons are worn in numerous subcultures and for different purposes and are extremely interesting design on. For this you only need a beer crown, a safety pin and super glue or hot glue.
Brochure needles would be ideal because they have a wider side, which makes it easier to apply the superglue and more stability offers. For a button, first edit the design according to your ideas and then stick the needle with super glue. Let it dry and the button is ready to use.
Tip: You can even make buttons for your clothes from the beer crowns if you defuse the edge and then drill four small holes in the sheet. Then you can simply sew the "button" on the respective clothing and thereby refresh your wardrobe or upcycling old shirts.
Charming snowmen
A combination of three bottle caps, which represent the individual balls of a Santa Claus, is popular as a Christmas decoration. Therefore paint They completely white the inside, the head with one face and the middle part with three to four black dots for the buttons that are typical of snowmen.
The individual elements are over the points sticky and a cord attached to the head over which the snowman can be hung.
Small bottle cap garden
If you are a garden fan, you can small ones garden projects realized in larger bottle caps. The focus is on the use of objects such as dry moss, pieces of wood, stones, figures and others that enable “garden design”. Children can let their imagination run wild when creating their own garden designs.
Glue the moss first and then others materials and decorative elements added. Garden concepts such as an Asian rock garden or a fairytale garden can be easily implemented with the necessary sensitivity.
Practical tea lights
Handicrafts with bottle caps also allow the production of efficient tea lights that you can refill again and again.
For this you need the following materials:
- beeswax
- Tealight wicks (100 pieces for about 3 euros)
- cooking pot
- kitchen thermometer
Start by cleaning and drying the selected bottle caps. Then heat it up beeswax up to 70 ° C, the ideal pouring temperature for the tea lights, and place a tea light wick directly in the middle of the crown cap. Hold it tight and pour a little beeswax into the bottle cap.
Don’t let the wax overflow. Now wait a little bit for the wick let go and then the tealight has to cool down. Wait until the tea lights have completely cooled down before using them. The tealights are an appealing and easy to make gift.
Beer Crown Flower
These flowers are an attractive alternative to artificial flowers and are a lot of fun for children. In addition to crown caps, you need pliers, hot glue and a stick to which they are attached.
First, build the blossom from seven bottle caps:
- put the bottle caps down like a flower

- glue the interfaces together

- attach this to the stick with hot glue and glue bottle caps to the back of the flower

Now place a larger bottle cap in the middle than the center of the flower.

- Glue two bottle caps on each side halfway up
- these are the leaves

In case you round instead oval leaves press the pliers together and glue them in place. You can also assemble your bottle cap flower from bent beer crowns and then glue the individual parts together.
Tip: Just as popular as the beer crown flowers are fir trees made of white or green closures, which are stacked and glued like a tree. Of course, you should reduce the diameter of the tree from bottom to top to get a classic cone shape that is reminiscent of a Christmas tree.
Crown cap plate for a unique look
You can make individual tops out of crown caps that can be used as a surface for a table or as a decorative element.
For this you need:
- grouts
- sufficient bottle caps
- Wooden plate or table in the desired size
- Silicone or glue (silicone is more effective)
- gloves
- rubber joints
- sponge
- microfiber cloth
- Acrylic paint in white
The instructions are described as follows.
Step 1: First stick the top caps on the table top. To do this, place them in the desired way and fix them. If you use silicone, you have to wait twelve hours after gluing, as it has to be completely firm.
2nd step: Then mix the grout and spread it out and between the beer crowns. Make sure that you fill the spaces in between as they must be closed. For this step, use the joint rubber and sponge, which allow precise work. First pull the joint rubber over the mortar so that it spreads. Then remove excess over the dampened sponge.
3rd step: Then wait a while before polishing the surface thoroughly with a microfiber cloth. Alternatively, paint visible wood.
Tip: If you take your time a little, you cannot re-enact a board game in the same way as chess or human annoyance. For this purpose, the individual lids are sorted by color, glued according to the pattern and fastened with the grout so that it can be used after drying.
Pendants or necklaces
Another nice idea is to design a chain that you can give away or wear yourself. For this, a drill, a necklace, a small key ring and Capsules required in the desired size, color and pattern. Once you’ve got these items, do the following.

- use pliers to firmly press one point together
- carefully drill a hole across the jag

- pass the key ring through the hole

The key ring is now firmly in place.

- Now run the chain through the ring or decorate the crown cap with nail polish, for example, decoratively and as you like

You don’t need to do more to make an appealing necklace or any further Pendants to tinker. Bottle caps with a large diameter are particularly good here, since they can easily be provided with the desired design. The little ones can let off steam here and various design options try out.
RELATED ITEMS
-

Make money gifts – creative diy instructions, Kreativraum24
Bottle with money fly With this money gift idea, all bottle gifts can be upgraded enormously. The money fly, made from 2 banknotes…
-

Crafts with children in autumn – 7 creative ideas
Autumn is clearly the best time of year for handicrafts – nature supplies the material, and autumn is also the place to celebrate numerous festivals for which…
-

Tinkering with plaster with children: five creative ideas
Handicrafts with children with plaster: Five creative > Reading time: 2 minutes Working with plaster bandages is the easiest way to work with plaster….
-
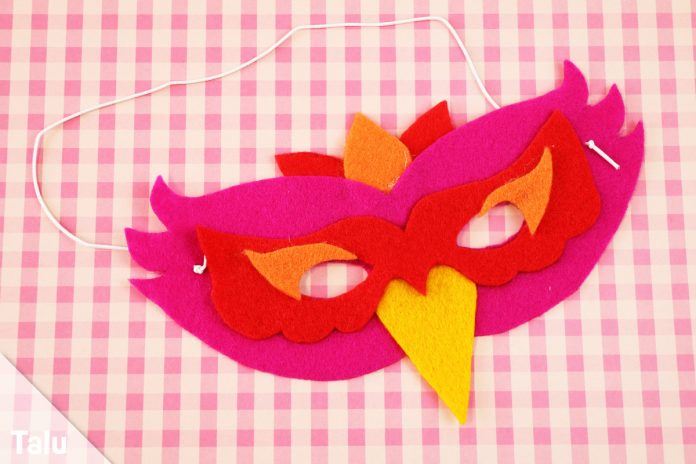
Make a bird mask – instructions with template and template
You are looking for creative ideas for do-it-yourself colorful bird masks – your children will be amazed by these ideas! The following instructions…