craftsman & handyman
DIY ideas for children’s rooms: rocking horse made of wood
DIY ideas for kids’ rooms or what to do with them Facility of the children’s room can do everything themselves.
If you don’t want your children’s room to look like it was simply taken from a 0815 furniture catalog, then it’s best to rely on DIY projects for the children’s room, which will make it something special and creative for your children in a short time.
In the children’s room you can let your imagination run wild and your children will probably also enjoy it. Especially if you consider the age, wishes, preferences, etc. of your children.
A small sample of the various possibilities to build furniture, toys and decorations for a children’s room yourself.
DIY ideas for children’s rooms: children’s toys
A child’s room not only includes a bed, cupboard and seating, but above all this and that which stimulates children’s creativity. Children love to close their room themselves shape.
The typical thing for children’s rooms is, of course, children’s toys.
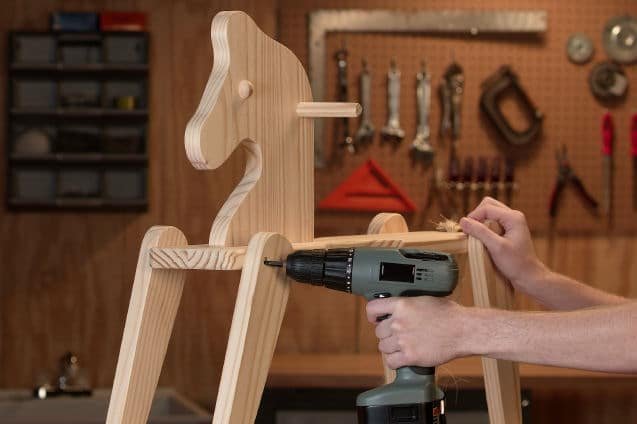
The rocking horse is a classic that has been loved by children for generations.
A rocking horse can of course also be bought cheaply in the nearest toy shop. However, if you want, for example, a high-quality model made of beech wood or another solid wood, building it yourself can even pay off in terms of price.
Build a rocking horse
For a rocking horse made from solid solid wood or alternatively from glued wood you need:
- Wood – preferably boards or boards planed to a thickness of 17 – 20 mm – made of beech or ash, for example. Or also from pine, spruce, alder or birch.
- Glue – what does it mean: wood glue. There is one in every hardware store. A 500 gr. Bottle should definitely be enough.
- Round bars to hold
- A jigsaw
- Drill or cordless drill
- pencil
- abrasive paper
- Oil for the final oiling of the wood – preferably linseed oil or hard oil
- or: acrylic paint (s)

Rocking horse – drill holes correctly
The most complex part of the project is cutting the individual parts with a jigsaw using a template, one of which large selection can be found on the net. Don’t forget to drill holes for the dowels or drill them in the right place.
Then smear all the sawn-out parts nicely with sandpaper – so that no edges or splinters spoil your child’s fun while playing.
Depending on how smooth you want the surfaces and edges to be, this step can also take another two or even three hours.
Now use dowels and glue to assemble all the sawn and sanded parts. If you use good wood glue, you do not need to press the glued parts together with a screw clamp.
It is enough to apply pressure for a few seconds (up to a minute) and then allow the freshly glued wooden horse a few hours before the first ride.
Finally, you can paint the rocking horse, which is now ready, in one or more bright acrylic colors.
Or you can leave out the acrylic paints and oil all wooden surfaces so that the wood structure is preserved. This could be an option especially if you are using solid solid wood.
DIY ideas for children’s rooms: night light
Even designed lamps are probably the most popular DIY ideas for children’s rooms. Perhaps you have already noticed that your child prefers to fall asleep with the lights on.
If you have previously done without a night light in the children’s room, now is the time to make your own lamp. A nice idea, which also works well as a night light in the children’s room, are single, illuminated letters in the style of illuminated signs.
For this you need the desired letters made of cardboard (can be ordered online), brush and color of your choice, a knife to cut open the letters and cut the holes, through which the light bulbs of an LED light chain are then inserted.
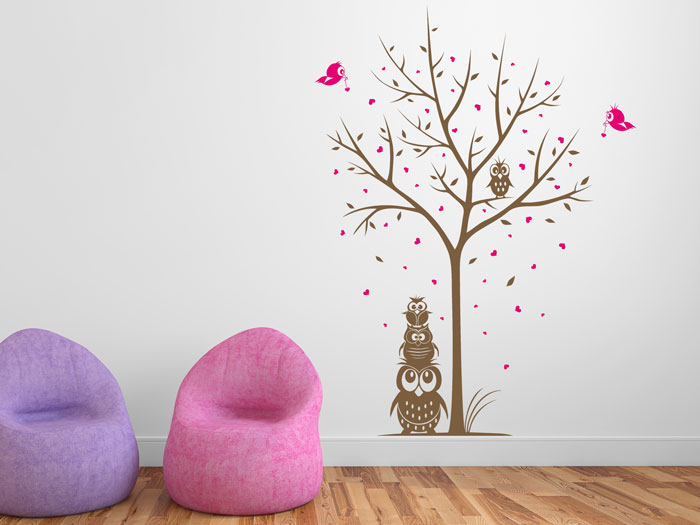
Design children’s wardrobes for individual needs
A point of contention between children and parents will probably always keep order. A practical and creative wardrobe may convince you to hang the jackets properly.
One option with little effort is to paint a colorful tree on the wall of the room, on the branches of which you attach the coat hooks. It looks like the jackets, scarves and hats are hanging from a tree.
If you want the tree to look even more realistic, you can build and paint a standing wardrobe construction in the shape of a tree on MDF boards and stencils.
RELATED ITEMS
-
Make children’s room colorful – great ideas – tips for the walls
Children love bright colors. Not only toys, furniture and clothing can often not be colorful enough. Also tolerate the walls in the children’s room…
-
Designing children’s rooms – the most beautiful mottos
Princess, knight or jungle the most beautiful mottos The children’s room is the children’s play area and the space in the apartment in which they are related…
-
Children’s room ideas and design with schwörerhaus, schwörerblog
Play, romp, learn, chill, sleep. Right it is about the children’s room, the realm of our little ones or big ones. The children’s room accompanies ours…
-
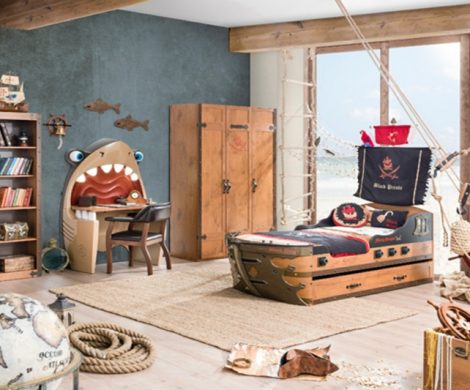
Design children’s room for small pirates
The design and furnishing of children’s rooms becomes a highly debated topic for families at the latest when the offspring reaches an age…